.webp)
How to Play Dressmaker – A Complete Beginner’s Guide to Designing and Sewing Dresses
Dressmaker is a cozy crafting and simulation game about running a dressmaking shop and creating custom garments for the people in town. Instead of simply selecting a finished outfit from a menu, you control many of the individual steps involved in making a dress, from choosing fabric and arranging patterns to sewing and decorating the final result.
For new players, Dressmaker can initially feel more complicated than a typical fashion game because the process is divided into several hands-on stages. A successful dress begins with understanding what the customer wants and continues through careful material selection, pattern placement, cutting, sewing, and decoration.
The game also gives players creative freedom. You can work with materials such as cotton, linen, wool, silk, and velvet, arrange fabric for individual panels, decorate garments with buttons and bows, and display finished designs in your shop.
This guide explains how to play Dressmaker, from understanding customer requests and choosing materials to cutting patterns, sewing garments, decorating dresses, and building an efficient shop routine.
1. Start by Understanding the Basic Gameplay Loop
The first thing to learn in Dressmaker is the order in which a dress is created.
Instead of choosing a completed dress and sending it directly to a customer, you work through several production stages.
The basic Dressmaker gameplay loop
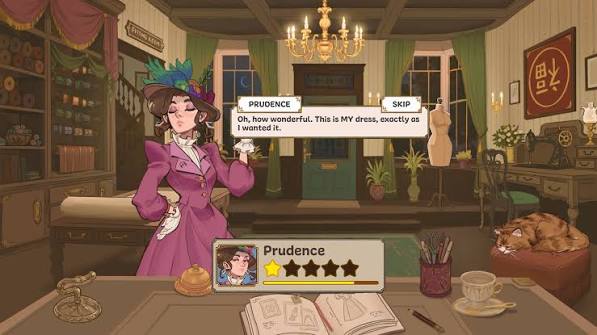
A typical commission can be approached in this order:
- Meet the customer.
- Read their request and preferences.
- Choose a suitable design.
- Select the fabric.
- Arrange the pattern pieces.
- Cut the fabric.
- Preview the pieces on the mannequin.
- Sew the garment together.
- Add decorations and accessories.
- Deliver the finished dress.
- Receive rewards and continue developing the shop.
The official game description confirms the central sequence of choosing fabric, arranging and cutting patterns, sewing garments, and adding decorations. Completed commissions can also provide reputation and coin.
Follow the order instead of rushing
Each stage affects the next one.
If you choose an unsuitable fabric, the final design may not fit the customer's preferences.
If the pattern is poorly arranged, the final panels can look different from what you intended.
If the sewing is inaccurate, the finished garment may not have the quality you expected.
Learning the order of the workflow is therefore one of the most important beginner skills.
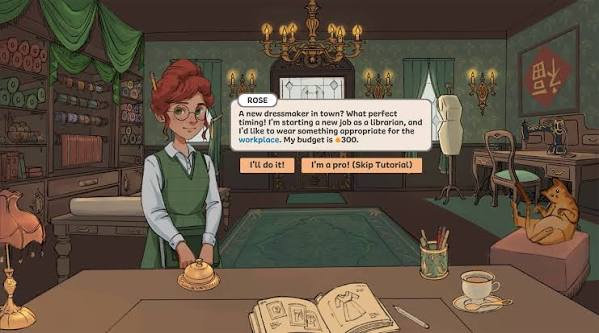
2. Learn How to Read Customer Requests
Customers are the starting point for many of your dresses.
Before choosing a fabric or decoration, pay attention to what the customer actually wants.
Focus on the important requirements
A customer's request can involve things such as:
- Occasion.
- Preferred style.
- Budget.
- Personal taste.
- Desired appearance.
A beginner-friendly approach is to treat the request as your design filter.
For example, if the customer needs something for a formal event, begin by considering designs and materials that fit that occasion rather than choosing your favorite fabric first.
Read before you spend
One useful habit is:
Request → Design → Fabric → Production
Do not reverse this order.
Choosing an expensive fabric before understanding the customer's budget can create unnecessary problems.
Likewise, adding decorations before deciding on the basic silhouette can make it harder to create a coherent final design.
3. Choose the Right Fabric
Fabric is one of the most important creative decisions in Dressmaker.
The game includes different materials such as cotton, linen, wool, silk, and velvet, giving you different options for the look and feel of each garment.
Think about the fabric as part of the design
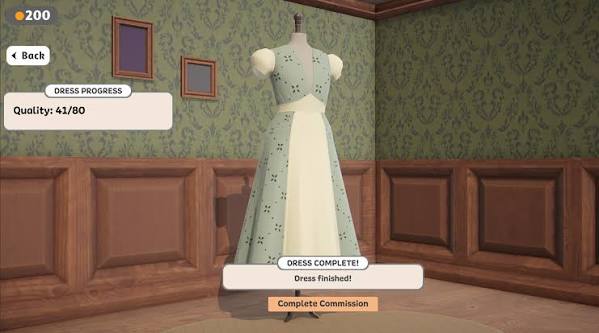
When choosing fabric, consider:
- Does it fit the customer's request?
- Does the appearance match the occasion?
- Does it fit the available budget?
- Does it work well with the design?
- Will the fabric choice complement the other panels?
You can assign different fabrics to different panels, which gives you additional creative freedom.
Do not always choose the most expensive material
More expensive does not automatically mean more suitable.
The objective is to create a garment that fits the customer's requirements while managing your available resources.
A simpler fabric that matches the brief can be more useful than an expensive material that clashes with the requested style.
4. Learn How to Design and Arrange the Pattern
Once you have a concept and fabric, the next stage is arranging the pattern.
This is where your design starts becoming a physical garment.
Pay attention to pattern placement
The way you arrange and cut the pattern affects the appearance of the final dress.
The game specifically allows fabric to be aligned with the grain or cut on the bias, and the way the pieces are arranged can be visible on the finished garment.
Before cutting, check:
- The direction of the fabric.
- The position of each pattern piece.
- Whether there is enough material.
- How the pattern will appear on the final garment.
- Whether you are leaving enough room for all required pieces.
Preview before committing
Using the mannequin preview can help you understand how the pieces will look together before you continue with production.
This is especially useful when experimenting with different fabrics or pattern arrangements.
5. Learn How to Cut Fabric Carefully
Cutting is one of the hands-on stages that makes Dressmaker different from a simple dress-up game.
You need to arrange the required pattern pieces and cut them from the fabric.
Avoid wasting fabric
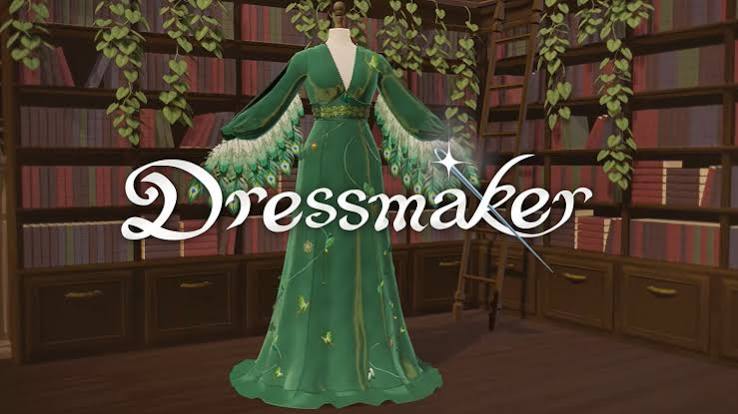
Before cutting:
- Check the pattern size.
- Look at the available fabric.
- Plan where each piece will go.
- Avoid unnecessary gaps.
- Check the direction of the fabric.
A small amount of planning can prevent you from using material inefficiently.
Treat cutting as part of the design
Cutting is not simply a technical step.
The orientation and placement of a piece can affect how the fabric appears later.
This is especially important when using patterned materials or when you want different panels to create a particular visual effect.
6. Learn How to Sew the Dress
Sewing is one of the most interactive parts of Dressmaker.
Instead of pressing a button to automatically create the finished garment, you guide the fabric through the sewing machine.
Follow the sewing line
The sewing interface can show a guide indicating where the seam should be made.
A useful approach is:
- Position the fabric correctly.
- Start the sewing action.
- Follow the guide.
- Keep your movement controlled.
- Slow down around difficult curves.
- Complete the seam before moving on.
The goal is consistency rather than speed.
Do not rush difficult sections
If the sewing line curves sharply, reduce your movement speed and make smaller adjustments.
Trying to move too quickly can make it harder to follow the intended seam.
The game's sewing controls are designed around physically guiding fabric through the machine, making accuracy an important part of the process.
7. Learn How to Decorate the Finished Dress
After the main structure is complete, you can add decorative elements.
Dressmaker allows players to customize garments with items such as buttons, bows, appliqué, and lace trims.
Add decorations after the structure works
A useful order is:
Structure → Sewing → Decoration
Do not use decorations to compensate for a weak basic design.
First make sure the dress has the right shape and the panels are correctly assembled.
Then consider:
- Buttons.
- Bows.
- Appliqué.
- Lace.
- Trims.
- Other accessories.
Match decorations to the customer
Decorations should support the overall design.
For an elegant request, a simple decoration may work better than adding every available accessory.
For a playful or colorful design, additional details may make more sense.
The key is keeping the final dress visually consistent with the original request.
8. Deliver Orders and Build Your Shop
Once the dress is complete, it is time to deliver the commission.
Completed dresses can provide coin and reputation, which help you continue developing your dressmaking business.
Treat every order as feedback
After completing a dress, look at what worked and what did not.
Ask:
- Did the design match the request?
- Was the fabric appropriate?
- Was the pattern arranged effectively?
- Was the sewing accurate?
- Did the decorations improve the final result?
This creates a useful improvement loop for future commissions.
Use the shop window
Dressmaker also allows you to display your own designs and sell pre-made dresses from the shop window.
This gives you another way to use garments that you have created, rather than treating every dress as a one-time commission.
9. Stay Organized When Managing Multiple Designs
As you become more comfortable, the creative freedom of Dressmaker can make it tempting to change everything at once.
That can make it difficult to understand why a particular dress does not work.
Change one decision at a time
If a design is not producing the result you want, adjust one element.
For example:
- Change the fabric.
- Test another pattern arrangement.
- Adjust the decorations.
- Improve the sewing.
- Try a different design.
This makes it easier to understand what actually changed.
Keep a consistent workflow
A reliable production sequence can be:
Customer request → Design → Fabric → Pattern → Cutting → Sewing → Decoration → Delivery
Following the same order every time reduces the chance of forgetting an important step.
10. Build an Efficient Dressmaker Strategy
Once you understand the individual mechanics, the final step is connecting them into a repeatable workflow.
The goal is not to make every dress identical. Instead, develop a process that gives you enough structure to experiment creatively without losing track of the customer's requirements.
Create a repeatable dressmaking routine
A strong routine can look like this:
- Read the customer's request carefully.
- Identify the occasion, style, and budget.
- Choose a suitable design.
- Select materials that fit the request.
- Arrange the pattern carefully.
- Preview the pieces.
- Cut the fabric efficiently.
- Sew each seam carefully.
- Add decorations after the main garment is complete.
- Deliver the finished dress.
- Review the result before starting the next commission.
This workflow keeps creativity connected to the practical requirements of running the shop.
Balance creativity and customer satisfaction
Dressmaker gives you considerable freedom, but creative freedom does not mean ignoring the customer.
The most useful mindset is:
Follow the brief first, experiment second.
Once you understand what the customer needs, you can make creative decisions within those boundaries.
Learn from every dress
If a dress does not look the way you expected, do not simply discard the idea.
Ask which stage caused the problem.
Maybe the fabric was unsuitable.
Maybe the pattern placement was wrong.
Maybe the sewing line was difficult to follow.
Maybe the decorations did not match the design.
Identifying the specific problem makes the next dress easier to improve.
Conclusion
Learning how to play Dressmaker is ultimately about turning a customer's request into a finished garment through a series of creative and hands-on decisions. From choosing fabrics and arranging patterns to cutting, sewing, decorating, and delivering the final dress, every stage contributes to the finished result.
For beginners, the best approach is to understand the customer's request first, choose materials carefully, plan the pattern before cutting, take your time when sewing, and add decorations only after the main structure is complete.
As you become more comfortable, you can experiment with different fabrics, pattern arrangements, colors, accessories, and your own designs for the shop window.
The most important thing to remember is that Dressmaker is not simply a game about choosing pretty clothes. It is about taking an idea from sketch to fabric, turning individual pieces into a finished garment, and building your own style as a dressmaker.